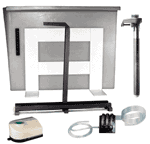
1. Setup Protect surrounding area's from developer and etchant splashes. Plastic is ideal for this. Work under safe light conditions, a 40W incandescent bulb works well. Do not work under fluorescent light. Just prior to exposure remove white protective film from presensitized board. Peel it back carefully. 2. Exposing your board For best results, use M.G. Chemicals cat. # 416-X exposure kit, however, any inexpensive lamp fixture that will hold one or more 18" fluorescent tubes is suitable. Directions: Place presensitized board, copper-side toward exposure source. Positive film artwork should be laid onto "presensitized" copper side of board and position as desired. Artwork should be place printed side down to prevent light leakage through the side of the transparency, and should have been produced by a 600 dpi printer or better. A glass weight should then be used to cover artwork ensuring no light will pass under traces ( Approx. 3mm glass thickness or greater works best ). Use a 10 minute exposure time at a distance of 5 inches. 3. Developing your board The development process removes any photoresist which was exposed through the film positive to ultraviolet light. Warning: Developer contains sodium hydroxide and is highly corrosive. Wear rubber gloves & eye protection while using it. Avoid contact with eyes and skin. Flush thoroughly with water for 15 minutes if it is splashed in eyes or on the skin. Directions: Using rubber gloves and eye protection, dilute one part M.G. Cat. # 418 Developer with ten parts tepid water (weaker is better than stronger). In a plastic tray. Immerse the board copper side up into the developer, and you will quickly see an image appear while lightly brushing the resist with a foam brush. This should be completed within one to two minutes. Immediately neutralize development action by rinsing the board with water. The exposed resist must be removed from the board as soon as possible. When you are done the developing stage, the only resist remaining will be covering what you want your circuit to be. The rest should be completely removed. 4. Etching your board For best results, use the 416-E Professional Etching Process Kit or 416-ES Economy Etching Kit. The most popular etchant is Ferric Chloride, M.G. Cat. # 415, an aqueous solution which dissolves most metals. Use this solution undiluted, and be sure to completely cover your board. Warning: This solution is normally heated up during use, generating unpleasant and caustic vapors, it is very important to have adequate ventilation. Use only glass or plastic containers. Keep out of reach of children. May cause burns or stain. Avoid contact with skin, eyes or clothing. Store in plastic container. Wear eye protection and rubber gloves. Directions: If you use ferric chloride cold, it will take a long time to etch the board. To speed up etching, heat up the solution. A simple way of doing this is to immerse the ferric chloride bottle or jug into hot water, adding or changing the water to keep it heating. A thermostat controlled crock pot is also an effective way to heat ferric chloride as is thermostatically controlled submersible heaters - glass enclosed such as an aquarium heater. An ideal etching temperature is 50°C ( 120°F ). Be careful not to overheat it. The absolute maximum working temperature is about 57°C or 135°F. The warmer your etch solution, the faster your boards will etch. Ferric chloride solution can be used over and over again, until it becomes saturated with copper. As the solution becomes more saturated, the etching time will increase. Agitation assists in removing unwanted copper faster. This can be accomplished by using air bubbles from two aquarium air wands with an aquarium air pump. Do not use aquarium "air stone". The etching process can be assisted by brushing the unwanted resist with a foam brush while the board is submerged in the ferric chloride. After the etching process is completed, wash thoroughly under running water. Do not remove the remaining resist protecting your circuit or image, it protects the copper from oxidation. 5. Soldering your board Removal of resist is not necessary when soldering components to your board. By leaving the resist on, your circuit is protected from oxidation. Tin plating your board is not necessary. When soldering, the heat disintegrates the resist underneath the solder resulting in an excellent bond. |
|
 |
 |
 |
 |
Phone: 570 842-4725 Fax: 570 842-4290 Cart: (Empty) |


